Hi there!
Happy Wednesday! I have a new tutorial for you today!
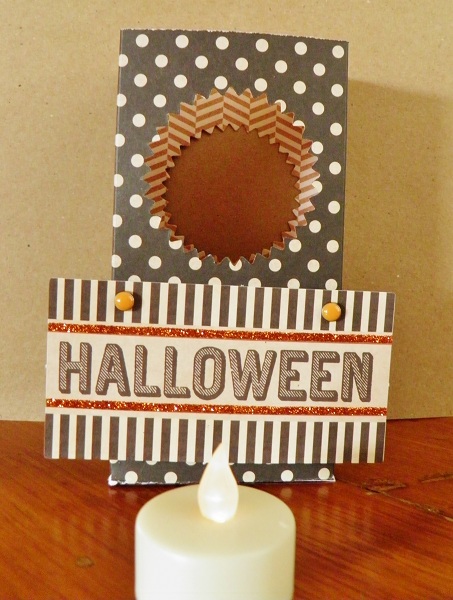
This one is really simple, get the kids involved, make a few to light your path on Halloween!
First start out with a piece of double sided patterned paper measuring 8" x 12".
Then score according to this diagram, the red lines indicate your score lines.
The next step is to trim along the horizontal score line to the vertical score line, like this.....
Now choose any shape die you want and line everything up in your Cuttledbug, so that your die is centred into one of the 3" sections. Your 'flaps' will need to be folded up so make sure you aren't die cutting them too. About one inch from the the edge should be fine.
Sandwich it up and run it through the machine, repeat for the other 3" section.
Now fold lengthwise into a box, you will have two 2" sections to overlap and apply adhesive to along one side. Then fold up the bottom flaps and add a bit of adhesive there too.
Keeping the embellishing to a minimum, makes it easier for kids, but you can go all out if you wish.
Please pop into your local dollar store and buy battery operated candles, we wouldn't want any little trick or treaters to get hurt if they knock one over or the wind picks up.
Wish I could have taken a good picture in the dark, but you get the gist!
Thanks for visiting!
Laura
xoxo


Wow ... I love how easy you have made this look ... definitely a fun idea ... would also be perfect for a backyard party in the summer etc. THANKS for sharing :)
ReplyDelete